With summer coming to an end and fall/winter quickly approaching, we want to make sure your fireplace is ready to go with providing you warmth throughout the cold months ahead. Here’s a step-by-step guide to help you get your fireplace ready for winter.
- Schedule a Professional Inspection
Before lighting your first fire of the season, it’s important to schedule an inspection, especially if you haven’t in the last 3 to 5 years of owning your product. A certified chimney sweep can check for blockages, structural issues, and creosote buildup, which can be fire hazards. Even more, take advantage of our inspection team for both wood and gas burning products. We will inspect your unit thoroughly and make sure all components are in good working condition. This inspection ensures that your fireplace is safe and functional for the season.
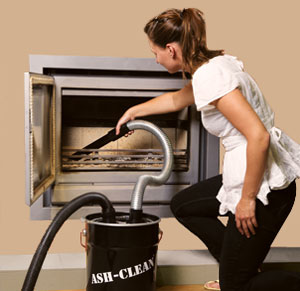
- Clean the Fireplace and Chimney
While a professional will handle a thorough cleaning, you should also do a preliminary cleaning. For wood, remove old ashes and soot from the fireplace. Use a fireplace shovel and broom to clear out the ash box, and ensure the grate is free of debris. For the chimney, a professional will use specialized tools to remove any soot and creosote that could lead to a dangerous chimney fire. For gas, clean the inside of the glass with an approved cleaner designed to take off the byproducts of gas. A thorough cleaning should be done each season and potentially twice a season depending on how often you use your product.
- Check for any Damage
Inspect the fireplace and surrounding area for any signs of damage. For wood, look for cracks in the firebox, loose bricks, or damaged mortar. For gas, look for the interior liner or logs that may be out of place. They all need to be in a specific position to work properly. Any issues noticed should be addressed. We always encourage our customers to reach out and ask the question when they may notice anything unusual.
- Inspect the Chimney Cap and Flue
Ensure your chimney cap is in good condition and sealed properly around the storm collar. The cap prevents debris, animals, and rain from entering the chimney. The cap is also an exit for all the byproducts of burning wood or gas. Check for any signs of damage or blockage. Even spiders and bees have been known to completely clog up a vent cap. If you notice any issues, have them repaired promptly to maintain proper ventilation. This should be inspected once a year by the homeowner before the burn season begins. At times, a homeowner may need to reseal with high temperature approved caulking around the storm collar every 1 to 2 years.
- Stock Up on Firewood
Gather a supply of seasoned firewood. Seasoned wood is dry and burns more efficiently, producing less smoke and creosote. Avoid using green or unseasoned wood, as it can cause excessive smoke and creosote buildup, leading to potential chimney fires. The moisture of your firewood should be 20% or less moisture. Moisture meters are sold at our showroom and also big box stores. It’s always good to have one on hand!
- Install a Fireplace Screen or Glass Doors
A fireplace screen or glass doors not only adds a touch of elegance but also serves a functional purpose. They help prevent sparks and embers from escaping, protecting your home and loved ones. Make sure they are properly fitted and in good condition. If your fireplace does not have a door, consider reaching out to us regarding our custom door options.
- Test Your Smoke and Carbon Monoxide Detectors
Always safety first! Ensure your smoke and carbon monoxide detectors are functioning correctly and have fresh batteries. These devices are crucial for detecting any potential issues while you’re enjoying your fireside warmth. Smoke detectors should be installed in every home of the house, tested monthly and also replaced after 10 years. For carbon monoxide detectors, you should have one on each level of the home, near sleeping areas, and near gas appliances. They should also be tested monthly and replaced between 5 and 7 years. As always, go by the instructions of the brand of detectors you have for replacement time frames.
- Check the Damper, Air Chambers, and Catalytic Combustors
The damper controls the airflow between the fireplace and the chimney. Make sure it opens and closes smoothly and creates a tight seal when closed. A properly functioning damper ensures efficient burning and prevents heat loss when the fireplace is not in use. The air chambers and catalytic combustors re-burn the smoke before they exit the stove or fireplace and into the chimney. Make sure those are vacuumed out thoroughly.
- Replace Batteries in Remotes
For gas, if you have a remote to turn on and off the fireplace, make sure you replace with fresh batteries in both the receiver underneath the fireplace and the handheld remote itself. Batteries no longer last for years and years. They also can leak corrosion which can damage electrical components. Usually you want to even buy brand new batteries and not use the batteries sitting on your shelf, as we never truly know how long those batteries have been sitting there or in the manufactures’ warehouses.
- Check your Pilot Light
For gas, check to make sure your pilot light is on. If it is not, follow the instructions in your owner’s manual to light the pilot light. Pilot lights are essential in our Midwest climate because they keep out the bugs that love the smell of gas in the summer as well as the summer humidity. But more importantly, in winter they keep the fireplace drafting properly allowing you to turn on without issues.
- Clear the Area Around the Fireplace
Keep the area around your fireplace free of flammable materials, such as paper, cloth, or furniture. This precaution helps prevent accidental fires and ensures safe use of your fireplace.
- Learn Proper Fireplace Use
If you’re new to using a fireplace, take some time to learn proper fire-building techniques. Avoid overloading the fireplace with too much wood, and always use dry, seasoned firewood. We love the top down method where you have 1 to 2 pieces of wood at the base, then pile your kindling, then place a natural fire starter on top. Yes we said that right, on top! Proper ventilation is crucial, so keep the flue open while the fire is starting. Then slowly close it after the fire is established. Starting fires on days above 30 degrees will require more work to help establish the draft than days below 20 degrees.
Conclusion
Preparing your fireplace for winter not only ensures that you can enjoy its warmth and ambiance but also keeps your home safe from potential hazards. By following these steps, you’ll be ready to cozy up by the fire and make the most of the winter season. Stay warm and enjoy the comfort of your fireplace!
For more tips and updates on fireplace maintenance, subscribe to our newsletter or contact us for professional assistance.